
 September 21, 2026 · Expense Manager
How to track monthly expenses: A simple system
Tracking monthly expenses means recording where your money goes throughout the month, organizing those transactions into useful categories and reviewing the results so you can understand your spending.
You do not need a complicated accounting system.
A simple monthly expense-tracking process looks like this:
Choose your month → Record income → Capture every expense → Categorize → Review weekly → Reconcile → Analyze → Start the next month
The most important part is consistency.
If you track only large purchases, ignore cash, forget subscriptions or wait until the end of the month to remember everything, your monthly total will not tell you much.
This guide shows you how to build a simple system that gives you a reliable picture of your spending.
Quick answer: How do you track monthly expenses?
To track monthly expenses effectively:
Choose the exact month you want to track.
Record your take-home income.
List your accounts and payment methods.
Record every transaction.
Separate fixed, variable and irregular expenses.
Assign expenses to simple categories.
Review spending once a week.
Check for missing cash, card and UPI transactions.
Compare actual spending with your budget.
Review category totals at month-end.
Compare your results with previous months.
Use what you learned to improve the next month’s plan.
A good monthly expense tracker should answer three questions:
How much did I spend?
Where did I spend it?
How does that compare with what I planned?
What does tracking monthly expenses mean?
Tracking monthly expenses is the process of recording and categorizing all the money you spend during a defined month so you can understand spending patterns, compare actual expenses with your budget and make better financial decisions.
Tracking and budgeting are related, but they are not the same.
A budget says:
“I plan to spend ₹6,000 on dining this month.”
Expense tracking tells you:
“I actually spent ₹8,250.”
Tracking gives you the evidence needed to improve the budget.
That creates a useful cycle:
Plan → Spend → Track → Review → Adjust
Consumer.gov recommends the same basic monthly process: plan how you will spend at the beginning of the month, record what you spend during the month, compare actual spending with your plan and use the results to prepare the next month’s budget.
You can review its official budgeting guidance here:
https://consumer.gov/your-money/making-budget
Why should you track expenses every month?
Monthly expense tracking gives you a broader picture than simply checking your bank balance.
Your bank balance tells you:
How much money is currently there.
It does not necessarily tell you:
how much you spent on food
how much went toward subscriptions
how much you paid in cash
whether shopping increased
whether transport costs changed
whether you stayed within your budget
whether recurring expenses are growing
whether you are saving consistently
Tracking turns transactions into useful information.
It helps you understand where your money goes
You may believe groceries are your biggest variable expense.
Your actual records might show dining and food delivery cost more.
Without tracking, that is difficult to see.
It makes budgeting more accurate
Your first budget is partly an estimate.
After tracking expenses for several months, you can use real numbers.
Instead of guessing:
Transport budget = ₹3,000
your records might show:
January: ₹4,100
February: ₹3,900
March: ₹4,300
Now you have better information for the next budget.
It can reveal recurring costs
Subscriptions and automatic payments are easy to overlook because you do not manually approve every payment each month.
Monthly tracking makes them easier to identify.
It can support savings goals
Expense tracking does not automatically save money.
It shows where there may be room to adjust spending.
That can make saving decisions more practical.
Step 1: Choose the exact tracking period
Start with a clear period.
For most people:
1st of the month → last day of the month
is easiest.
For example:
September 1 to September 30
Do not mix:
August 24 → September 23
with:
September 1 → September 30
unless you deliberately use a payday-based system.
A fixed period makes month-to-month comparisons easier.
What if your credit-card statement uses different dates?
That is normal.
Your card statement cycle may not match the calendar month.
You can still track transactions according to the date when each purchase happened.
The goal is to create one consistent reporting period across:
cash
UPI
debit card
credit card
bank transfer
digital wallets
Step 2: Record your monthly income
Expense tracking becomes more useful when you can compare spending with income.
Record money received from sources such as:
salary
freelance work
business income
rental income
commissions
allowances
other regular income
Use take-home income where relevant.
For example:
Salary: ₹55,000
Freelance work: ₹10,000
Total monthly income:
₹65,000
Now when total monthly expenses reach ₹52,000, you have useful context.
Income:
₹65,000
Expenses:
₹52,000
Difference:
₹13,000
Without recording income, you can track spending but cannot see the full monthly cash-flow picture.
Step 3: List every place you spend money from
This is one of the most important steps.
Your expenses may be spread across:
bank accounts
debit cards
credit cards
UPI
mobile wallets
cash
joint accounts
If you review only your primary bank account, you may miss a large part of your spending.
For example:
UPI expenses: ₹15,000
Credit-card expenses: ₹8,000
Cash: ₹3,000
Digital wallet: ₹2,000
Actual tracked spending:
₹28,000
Reviewing only your UPI activity would make it look like you spent ₹15,000.
Create a payment-source checklist
You might list:
Personal bank account
Credit card
Cash wallet
UPI
Joint family account
Then make sure transactions from each source are included in your monthly records.
Expense Manager supports multiple accounts, allowing different financial areas such as personal spending, credit cards, savings, business spending or household expenses to be tracked separately while still providing consolidated views.
Step 4: Record every expense
Now begin recording transactions.
For every purchase, capture at least:
amount
date
category
payment method or account
You can optionally add:
merchant
note
receipt
subcategory
For example:
| Date | Expense | Amount | Category | Payment |
|---|---|---|---|---|
| Sept 2 | Groceries | ₹1,250 | Groceries | UPI |
| Sept 3 | Fuel | ₹1,500 | Transport | Credit card |
| Sept 4 | Coffee | ₹180 | Dining | Cash |
| Sept 5 | Netflix | ₹649 | Subscriptions | Card |
A transaction log like this builds the foundation for your monthly report.
Record small expenses too
One common mistake is recording:
rent
insurance
EMI
grocery shopping
but ignoring:
coffee
snacks
parking
delivery charges
quick UPI payments
impulse purchases
Small transactions may not matter individually.
Repeated throughout the month, they can become a meaningful spending category.
If you want to build the daily habit behind this monthly system, read:
How to track daily expenses on your phone
Step 5: Track cash and digital spending together
Cash is especially easy to lose track of.
Suppose you withdraw:
₹5,000
That cash withdrawal itself does not automatically mean you spent ₹5,000 on one category.
You may actually use it for:
Groceries: ₹1,500
Transport: ₹700
Dining: ₹800
Household items: ₹1,200
Cash remaining: ₹800
If you simply record:
ATM withdrawal — ₹5,000
you lose useful category information.
Where practical, record the actual expenses made from the cash.
The same principle applies across digital payment methods.
Your monthly expense tracker should represent what you bought, not merely how money moved between accounts.
Step 6: Create simple expense categories
Categories turn a long transaction list into information you can understand.
A beginner-friendly category structure might include:
Housing
Groceries
Dining
Transport
Utilities
Healthcare
Education
EMI/Debt
Shopping
Entertainment
Subscriptions
Travel
Personal care
Household
Other
Do not create too many categories initially.
Instead of:
Coffee
Tea
Lunch
Dinner
Restaurant
Delivery
Snacks
you might begin with:
Dining
If later you need more detail, add subcategories.
What makes a good category?
A category should help answer a useful question.
For example:
How much am I spending on food outside the home?
Then “Dining” is useful.
If a category does not help you make any financial decision, it may not need to exist.
Step 7: Separate fixed, variable and irregular expenses
Another useful layer is classifying expenses by how they behave.
Fixed expenses
These remain relatively predictable.
Examples:
rent
EMI
insurance
internet plan
memberships
Variable expenses
These change from month to month.
Examples:
groceries
dining
fuel
shopping
entertainment
Irregular expenses
These happen occasionally rather than monthly.
Examples:
vehicle servicing
annual insurance
festival expenses
planned travel
home repair
annual software renewal
Why does this matter?
Because a month with ₹15,000 of vehicle repairs should not automatically make you conclude that your normal monthly spending increased permanently.
Classifying irregular expenses gives the numbers context.
Step 8: Track recurring expenses carefully
Recurring payments can quietly increase monthly expenses.
Review transactions such as:
streaming subscriptions
software
cloud storage
memberships
internet
mobile plans
EMI
insurance
recurring donations
A useful monthly expense tracker should make recurring costs easy to identify.
Expense Manager currently supports recurring transactions for expenses such as rent, EMI and subscriptions. Once configured, recurring entries can be generated according to the selected schedule.
Step 9: Use receipt scanning when manual entry is inconvenient
Receipts can be useful when:
buying several items
paying cash
tracking business-related purchases
keeping supporting records
If manually typing receipt information is slowing down your tracking habit, receipt scanning can reduce some of that friction.
Expense Manager currently includes OCR receipt scanning that can extract transaction details from a receipt image.
That makes it relevant for people searching for an expense manager with receipt scanning.
The important rule remains:
Review the transaction before saving it.
Automated extraction can speed up entry, but your final records should still be accurate.
Step 10: Review your expenses once a week
Do not wait until the month is finished.
A short weekly review can catch missing transactions and unusual spending while you still remember what happened.
Set aside five or ten minutes.
Check:
total spending
missing expenses
largest spending categories
cash purchases
recurring payments
unusual transactions
remaining budget
For example:
Dining budget: ₹4,000
After two weeks:
Dining spending: ₹3,400
You now know there is only:
₹600
remaining if you want to stay within the target.
That information is useful halfway through the month.
It is much less useful after the month is over.
Step 11: Reconcile your records before month-end
Reconciliation means checking whether your tracker matches the transactions that actually occurred.
You do not need formal accounting knowledge.
Simply compare your records with:
bank transaction history
UPI history
credit-card transactions
digital-wallet records
cash you remember spending
Look for:
missing transactions
duplicate transactions
incorrect amounts
incorrect categories
transfers recorded as expenses
Be careful with transfers
Suppose you move:
₹10,000 from savings account A to account B
You did not necessarily spend ₹10,000.
You moved money.
If you record transfers as expenses, your monthly spending total becomes artificially high.
The same problem can happen when paying a credit-card bill.
If you already recorded the original purchases as expenses and then record the card payment as another expense, you may count the same spending twice.
A reliable monthly tracking system should distinguish:
Expenses
from:
Transfers between accounts
Step 12: Close the month with a category report
At the end of the month, total each category.
For example:
| Category | Monthly total |
|---|---|
| Housing | ₹15,000 |
| Groceries | ₹7,500 |
| Dining | ₹4,800 |
| Transport | ₹5,200 |
| Utilities | ₹3,500 |
| Shopping | ₹4,500 |
| Subscriptions | ₹1,800 |
| Entertainment | ₹2,200 |
| Other | ₹3,000 |
| Total | ₹47,500 |
Now you have a meaningful monthly picture.
Instead of looking at 120 separate transactions, you can immediately see which categories matter most.
Step 13: Compare your actual spending with your budget
Expense tracking becomes far more valuable when compared against a plan.
Suppose:
| Category | Budget | Actual | Difference |
|---|---|---|---|
| Groceries | ₹7,000 | ₹7,500 | +₹500 |
| Dining | ₹3,000 | ₹4,800 | +₹1,800 |
| Transport | ₹5,000 | ₹5,200 | +₹200 |
| Shopping | ₹4,000 | ₹4,500 | +₹500 |
| Entertainment | ₹2,500 | ₹2,200 | -₹300 |
Now you know:
Dining exceeded the plan most significantly.
The next question is:
Why?
Perhaps:
several social events occurred
food delivery increased
the original budget was unrealistic
the month was unusual
Expense tracking should help you understand spending rather than automatically judging every increase as bad.
Step 14: Compare month-over-month spending
One month gives you a snapshot.
Several months show a trend.
For example:
| Category | July | August | September |
|---|---|---|---|
| Groceries | ₹7,100 | ₹7,400 | ₹7,500 |
| Dining | ₹2,800 | ₹3,600 | ₹4,800 |
| Transport | ₹4,900 | ₹5,000 | ₹5,200 |
| Shopping | ₹3,500 | ₹4,100 | ₹4,500 |
This reveals something that one month’s report may miss:
Dining has increased for three consecutive months.
Now you can investigate whether that reflects:
lifestyle change
inflation
increased social activity
convenience spending
a category that needs a larger realistic budget
Expense Manager supports comparisons between different periods, such as this month versus last month, which can make this type of analysis easier.
See:
A simple monthly expense tracking example
Suppose Priya earns:
₹55,000 per month
During September she tracks:
Housing: ₹14,000
Groceries: ₹7,500
Dining: ₹4,000
Transport: ₹5,000
Utilities: ₹3,500
EMI: ₹6,000
Shopping: ₹3,500
Entertainment: ₹2,000
Subscriptions: ₹1,500
Other: ₹2,000
Total expenses:
₹49,000
Income:
₹55,000
Difference:
₹6,000
But the useful information is not only that ₹6,000 remains.
Her category report also shows:
dining increased by ₹1,500 compared with August
subscriptions increased by ₹500
groceries remained stable
transport decreased slightly
Priya now has information she can use when planning October.
That is the difference between:
recording transactions
and:
using expense data
Spreadsheet vs expense tracking app
Both methods can work.
| Feature | Spreadsheet | Expense tracking app |
|---|---|---|
| Customizable | High | Usually high |
| Mobile entry | Less convenient | Convenient |
| Categorization | Manual | Built in |
| Monthly reports | Requires setup | Often automatic |
| Multiple accounts | Manual setup | Often built in |
| Receipt scanning | Usually no | Available in some apps |
| Offline tracking | Possible | Depends on app |
| Search/filtering | Available | Usually built in |
| Best for | Custom analysis | Everyday tracking |
A spreadsheet may be ideal if:
you enjoy working with spreadsheets
transaction volume is low
you want highly customized reports
An expense tracking app may be easier if:
you record expenses frequently
your phone is always with you
you want faster categorization
you want monthly reports automatically
you manage several accounts
The best method is the one you can maintain consistently.
How to track monthly household expenses
A household expense tracker needs to capture spending from more than one person.
Typical household categories include:
rent or mortgage
groceries
electricity
internet
education
healthcare
household items
transportation
entertainment
subscriptions
If several people make purchases, decide how transactions will be recorded.
For example:
Person A: records personal purchases.
Person B: records personal purchases.
Shared account: contains household expenses.
Expense Manager supports multiple and shared accounts, which can help families keep shared household spending separate from private personal accounts.
How freelancers can track monthly expenses
Freelancers often need to monitor both variable income and expenses.
A useful structure is:
Personal account
Track:
housing
groceries
transport
personal subscriptions
entertainment
Business account
Track:
software
advertising
business travel
professional services
equipment
other business expenses
Keeping the two areas separate makes monthly reports more useful.
Expense Manager allows separate personal and business accounts, making it suitable as an expense tracker for freelancers or an expense manager for small business when basic transaction tracking is needed.
How students can track monthly expenses
Students usually need a simpler system.
Useful categories might include:
food
transport
education
books
entertainment
subscriptions
shopping
If monthly allowance is:
₹10,000
and spending reaches:
₹8,500
by the 20th of the month, the student immediately knows only ₹1,500 remains.
That is why an expense tracker for students can be useful even when income and expenses are relatively small.
The purpose is not accounting complexity.
It is spending awareness.
How Expense Manager helps track monthly expenses
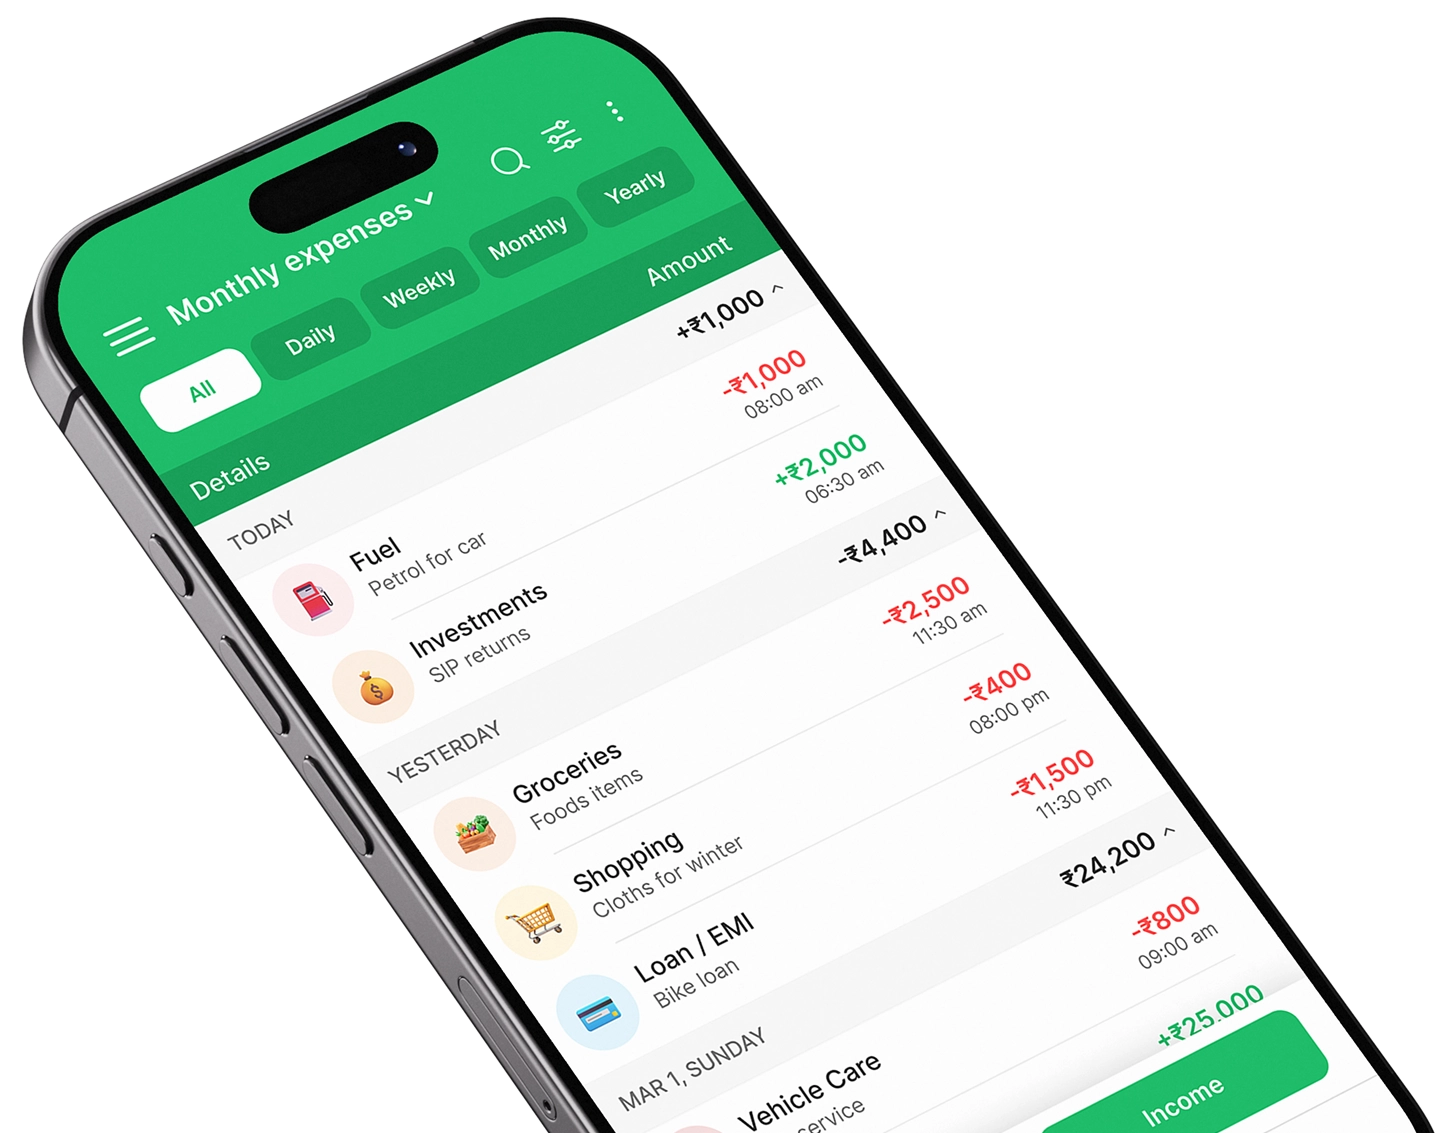
Expense Manager is an expense tracker and budget planner designed to help users organize everyday income and spending.
For monthly tracking, the app currently supports features including:
income and expense entry
categories and subcategories
multiple accounts
personal and business accounts
shared household accounts
daily, weekly, monthly and yearly views
income-versus-expense charts
category-wise reports
filters and transaction search
recurring transactions
receipt scanning with OCR
offline expense tracking
PDF and Excel reports
You can review the current feature details on the Expense Manager FAQ.
A practical monthly workflow inside an expense manager app can be:
Record → Categorize → Review → Compare → Adjust
For example:
At the end of September, your spending tracker might show:
Food: ₹9,000
Transport: ₹5,200
Shopping: ₹4,500
Subscriptions: ₹1,800
Entertainment: ₹2,200
You can compare those amounts with your budget and previous months.
That is where an income expense tracker app becomes more valuable than simply keeping a transaction list.
Download Expense Manager App
If you want to track monthly expenses from your phone, Expense Manager is available for Android and iPhone.
Android
Download Expense Manager app on Google Play
iPhone
Download Expense Manager app on the Apple App Store
The Android version can also be used as an offline expense manager, with transaction history, reports and spending insights available without a constant internet connection.
A simple monthly tracking routine
You do not need to spend hours maintaining your finances.
Try this routine.
Every transaction
Spend → Record → Categorize
Once a week
Spend 5–10 minutes checking:
missing transactions
category totals
cash spending
subscriptions
remaining budget
Mid-month
Ask:
Am I spending at the expected rate?
If a category is already close to its monthly limit, adjust early.
Last day of the month
Review:
Income → total expenses → category spending → savings → budget performance
Beginning of next month
Use last month’s actual numbers to improve your new budget.
The system becomes:
Track → Review → Learn → Plan again
Common mistakes when tracking monthly expenses
Tracking only large expenses
Small transactions disappear from your records.
Better approach: Record all meaningful spending.
Ignoring cash
Bank and UPI history cannot show cash purchases automatically.
Better approach: Record cash purchases separately.
Tracking only one account
Credit cards, wallets and joint accounts get missed.
Better approach: Create a list of every spending source.
Using too many categories
Tracking becomes tiring.
Better approach: Start with broad categories and add detail only when useful.
Recording transfers as expenses
This inflates monthly spending.
Better approach: Separate transfers from actual purchases.
Counting credit-card spending twice
You record the original purchase and then record the card repayment as another expense.
Better approach: Record the underlying purchase once and treat repayment appropriately in your tracking system.
Waiting until month-end
Small purchases are forgotten.
Better approach: Record expenses throughout the month.
Tracking without reviewing
You create a database but learn nothing from it.
Better approach: Review weekly and analyze monthly.
Changing categories every month
Comparisons become difficult.
Better approach: Keep your core categories consistent.
What should you look for in a monthly expense tracker?
If you use an app, useful features include:
fast transaction entry
income tracking
custom categories
multiple accounts
recurring expenses
monthly reports
spending insights
search and filters
data export
offline access where important
receipt scanning if needed
privacy controls
Do not select a money manager app simply because it has the largest number of features.
The best expense tracker is the one that makes your tracking habit easier to maintain.
If you are comparing options, read:
How long should you track expenses?
One month is enough to start learning.
Three months is more useful.
Six to twelve months can reveal:
seasonal spending
annual expenses
lifestyle changes
recurring patterns
category growth
For example, tracking only December may make entertainment and shopping look unusually high.
Several months give you a better baseline.
The objective is not necessarily to track expenses temporarily.
Once the system becomes simple enough, monthly tracking can become part of your regular personal-finance routine.
Frequently asked questions
What is the easiest way to track monthly expenses?
Choose one tracking method, record every transaction, use a small set of categories and review your totals each week. At the end of the month, compare category totals with your budget and previous month.
How do I track all my expenses for a month?
Start with a defined date range and include transactions from every source: cash, UPI, cards, bank accounts and digital wallets. Record each expense with its amount, date and category.
Should I track expenses daily or monthly?
Record expenses daily or as soon as practical, then analyze them monthly. Daily recording improves accuracy, while the monthly review reveals broader spending patterns.
What categories should I use for monthly expenses?
Start with broad categories such as housing, groceries, dining, transport, utilities, healthcare, debt, shopping, entertainment, subscriptions and other expenses. Add subcategories only when they provide useful insight.
Should credit-card payments count as monthly expenses?
The purchases made with the credit card are expenses. Be careful not to count both the purchases and the later card-payment transfer as separate spending, or you may double-count expenses.
How do I track cash expenses?
Record individual cash purchases where possible rather than treating the entire ATM withdrawal as one expense. This preserves useful category information.
Is a spreadsheet good for monthly expense tracking?
Yes. A spreadsheet can work well if you are comfortable entering transactions manually and building your own totals and reports. An expense tracking app can be more convenient for frequent mobile entry and automated summaries.
Can an expense tracker help me save money?
Indirectly. An expense tracker shows where money is going and highlights spending patterns. You can then decide whether certain expenses should be reduced and redirect the difference toward savings.
Which app can I use to track monthly expenses?
Expense Manager supports transaction tracking, categories, multiple accounts, recurring expenses, monthly reports, receipt scanning and offline access.
Google Play:
https://play.google.com/store/apps/details?id=com.pavansgroup.expensemanager
Apple App Store:
https://apps.apple.com/us/app/expense-manager-budget-buddy/id6744145641
How often should I review my expense tracker?
Record transactions regularly, perform a short review once a week and complete a full monthly review at the end of each tracking period.
Conclusion
Tracking monthly expenses does not need to be complicated.
The simplest reliable system is:
Record every transaction.
Use consistent categories.
Include every payment method.
Review weekly.
Reconcile missing transactions.
Analyze the month.
Compare with your budget.
Use the results to improve next month.
The biggest mistake is treating expense tracking as data entry.
The real value comes from what you learn after the transactions have been recorded.
When you know exactly how much went toward housing, groceries, dining, transport, subscriptions and other categories, you can make better decisions about budgeting and saving.
If you want to manage the process from your phone, Expense Manager app can be used as an expense tracker, budget planner and spending tracker for personal, household and freelance finances.
Download Expense Manager:
Google Play:
https://play.google.com/store/apps/details?id=com.pavansgroup.expensemanager
Apple App Store:
https://apps.apple.com/us/app/expense-manager-budget-buddy/id6744145641
Start with one month.
Track consistently.
Then let the numbers show you what needs to change.
Author bio
The Expense Manager editorial team creates practical educational content about expense tracking, budgeting, saving and everyday personal finance. Expense Manager is developed by Pavans Group Techsoft Private Limited.
This article provides general educational information and does not constitute individualized financial, investment, tax or legal advice.
Take control of your finances
Download Expense Manager and start your smarter money journey today.